I got to thinking that with all the swaps that we do, we've never talked about doing signature blocks before. It was on my mind lately, so I decided to take one of the traditional quilt blocks and show how you can convert it into a signature block. I also had fun and played with color placement. Fun right???
A 6 inch finished block is great for scraps too!!
What you'll need:
* Fabrics: grey, blue, yellow or orange, and green.
* sewing machine
* 1/4" foot (optional)
* neutral thread
* rotary cutter and mat
* Acrylic ruler
* chalk pencil (or other non-permanent fabric marking pen/pencil)
* Pigma fabric pen (for signature)
Fabric Cutting:
* Grey fabric (outer border): (1) 3-1/4" x 3-1/4" square and (4) 2-1/2" x 2-1/2" squares
* Blue fabric (star points): (2) 3-1/4" x 3-1/4" squares
* Green fabric (inner border): (1) 3-1/4" x 3-1/4" square
*Yellow or Orange fabric (inner square): (1) 2-1/2" x 2-1/2" square

(I used scraps from a leftover charm pack and some Kona Ash as the grey.)
Assembly:
Now comes the fun part! Let's sew this block together! I'm going to give you a tip on how to make a Quarter Square Triangle (QST) without cutting individual triangles! Everyone loves a shortcut right???
Take your 3-1/4" squares of blue fabric and draw a diagonal line through it. Then pair one blue square with the matching green fabric 3-1/4" square and the other blue square with the grey 3-1/4" square.

(It's kinda hard to see my lines.)
Using either your 1/4" foot or a 1/4" line on your machine, sew 1/4" on both sides of the drawn line. Do not sew on you line because we are going to cut there. After you've sewn your two seams, cut on the center line that you drew.

(Your squares should look like this.)
Press to the darker side (in this case, I pressed towards my blue fabric). Now, take one Grey/Blue square and match it with one Green/Blue square right sides together where the blue is on opposite sides.

(It should look like this.)
Now we are going to do the same. Draw a diagonal line perpendicular to the sewn line.

(Like this. Notice the dog ears? When we pressed to the blue side of each triangle it allowed for the pressed seam to be opposite of each other when they are matched. This allows for less bulk in your seam.)
Again, we are going to sew 1/4" away from each side of the drawn line. Once sewn together, we are going to cut down the center and press to the darker side.

Now we are going to square up our QSTs to make them 2-1/2" squares. This will cut off dog ears and the excess fabric (sometimes pressing or not exact 1/4" seams will make your squares a tad off).

(I have a 2-1/2" square acrylic ruler that comes in handy when working with small blocks or pieces.)
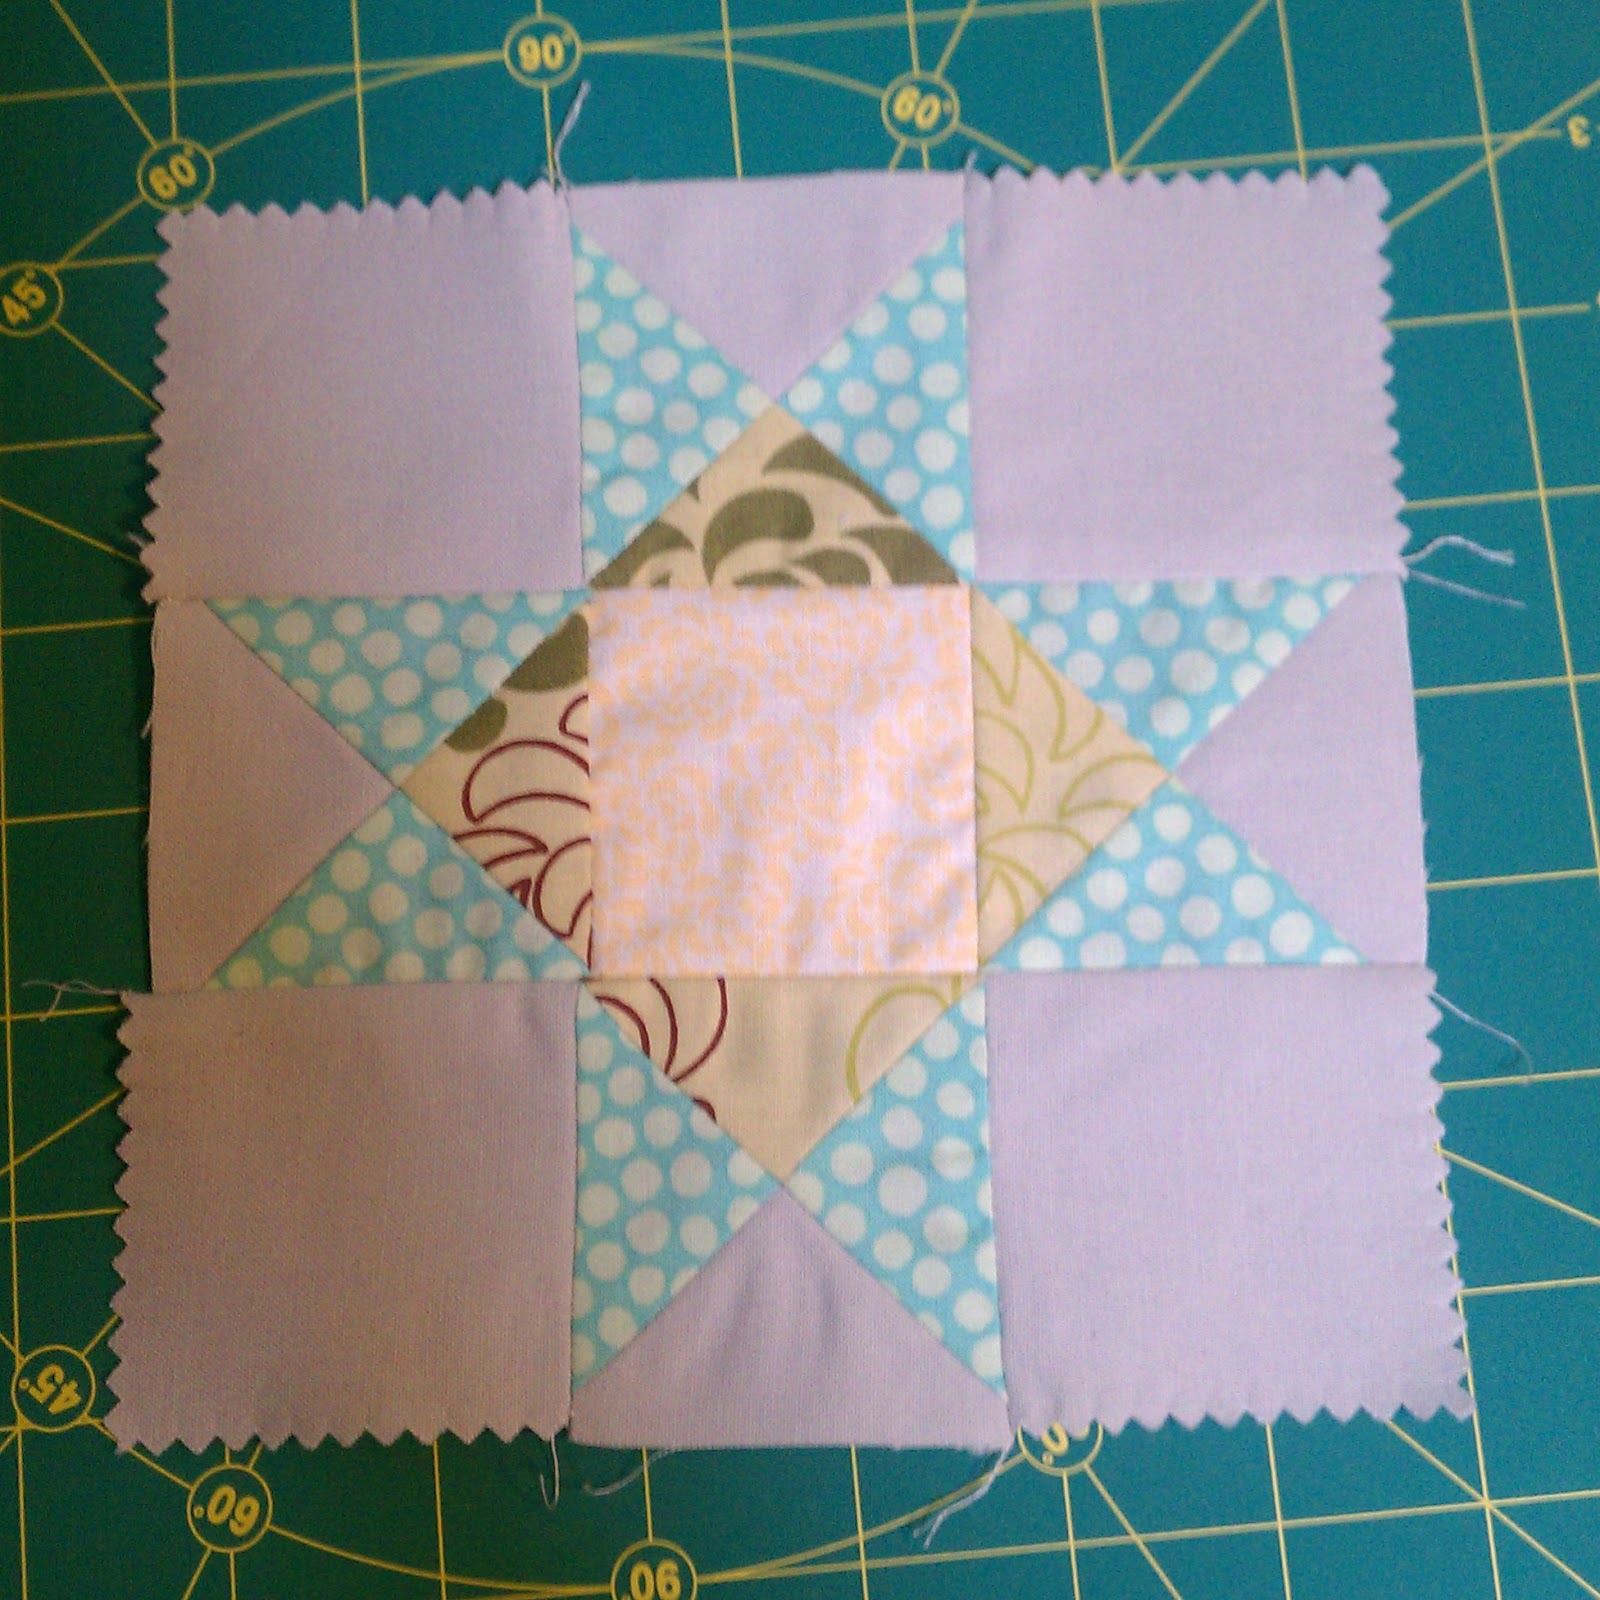
Now we are going to lay out our pieces to where they go and play with the the arrangement of colors.

Now to sew the block together. I always work top to bottom and left to right. Sew your squares together to make 3 rows. Press the seams toward the center block in the top and bottom rows. Press the seam away from the center in the center row.

Sew your rows together. Press the seams away from the center.
Now that your block is finished, it's time to sign the center block. Using your Pigma pen, put the info in the center. On this one, I put my name at top and "Misfit Quilters" and the state I live and year the block was made on the bottom. You can sign the block however you wish, just follow the swap instructions.
No comments:
Post a Comment